Showing posts with label Breakfast. Show all posts

Tuesday, 19 January 2016

Shakshouka--An Irresistible Arabic Breakfast

Shakshouka! The dish is as simple to make as complicated as it sounds. I have been hearing and seeing this dish popping up on my FB timeline almost every weekend and while the dish didn't entice me first as I don't quite enjoy poached eggs, the curiosity around this dish kept on increasing with every passing post. Recently, a very dear friend and his wife came to visit us. Serving breakfast is a bit challenging for me and that was when Shakshouka came to my rescue. It is the same Bread and Eggs breakfast but with a delicious makeover. You must try this for your next weekend breakfast and let me know how addictive it is!!
Ingredients 
3-4 eggs as per your requirement 
2 large tomatoes chopped 
1 medium onion chopped 
3-4 fat cloves of garlic finely chopped 
1/2 red bell pepper cut into strips
1-2 chillies chopped (optional)
2 tsp fresh parsley chopped 
2 tsp lebanese 7 spices (you can substitute this with 1 tsp freshly ground cumin powder, 1 tsp coriander powder)
1/2 tsp garam masala powder (you can skip this if using lebanese 7 spices)
1 tsp cayenne pepper 
Salt and pepper to taste 
2 tsp oil

Direction 
Heat oil in a frying pan and add the onions. Fry till soft and then add the chopped garlic. Keep stirring until the raw smell disappears. Now add the bell pepper and fry just until little soft. Next add the tomatoes and the spices and keep stirring till the tomatoes are mushy and soft and start leaving their juices. Check for seasoning as you won't be able to stir once you add the eggs. Now gently break the eggs on top of the tomato base and reduce the flame to minimum. Let the eggs cook till no clear liquid remains. Sprinkle fresh parsley on top with a dash of freshly ground pepper.   Enjoy with your favourite bread. Goes especially well with challah bread. 

Monday, 11 January 2016

Shortbread Chocolate Chip Cookies

First of all, a very happy new year to all my readers. I know I am quite late in wishing but due to health reasons I was quite tied up in the first week of the month. Nevertheless, I couldn't stay away too long from blogging and cooking and so with a very dear friend visiting us this week, I thought it was the perfect time to get back to routine and bake some yummy cookies for them to enjoy with their tea and coffee. These cookies are amazingly easy and eggless too!! You must try these if you have been looking for a quick way to heaven!! 

Ingredients 
1 cup butter, just soft enough to beat but not melted
1/2 cup sugar 
2 cups all purpose flour
1 1/2 tsp lemon extract (you can use Vanila, orange, or any flavor of your choice)
Chocolate chips for the toppings 

Direction 
Best the butter and sugar together until fluffy. Now add the extract and beat for a second. Lastly add the flour little at a time and beat until incorporated. You may use your hands at this time instead of the beater. 
Pre heat the oven at 175 degree celcius and line a baking tray with parchment paper. With the help of an ice cream scoop, scoop out small portions of the dough and drop on the prepared baking sheet. Once you have spaced all the cookies 1" apart, using your hands, smooth the cookie drops to an even top and sprinkle some chocolate chips on top. Bake in the pre heated oven for 12-15 minutes till the bottom is slightly golden and the tops spring back lightly when gently pressed. Remove from oven and let them cool in the tray for 5 minutes before transferring them to a wire rack to cool completely. Store in air tight containers. 

Friday, 18 September 2015

Wholewheat Bread

Conducting bread baking classes at home are proving quite beneficial to me in a way that my breads are getting better and more perfect than what they used to be. Since I am the instructor, it is extremely important for me to practice all my demo recipes before the class and thus perfection sets in. I am in love with my breads now more than ever before and hate to buy a loaf from the store even if it means taking a sweat shower in the kitchen in the unbearable Singapore heat!!
Ingredients 
2 cups wholewheat flour sifted (I have found Sharbati Atta of any brand gives you the best results; here, I have used Pilsbury Gold but Peshwai or Ashirwaad Sharbati will work equally well)
1 cup bread flour or all purpose flour 
3 tsp or 1 tbsp instant yeast 
1 tbsp sugar
2 tsp salt
1/4 cup milk powder 
250 ml warm water not exceeding 41 degree celcius or comfortable enough to hold a drop on the back of your wrist 
2 tbsp butter room temperature (I use low fat margarine)
Olive oil for greasing 

Direction 
Proof the yeast first. Dissolve the sugar into 150 ml warm water and mix in the yeast. Let it stand for 10 minutes till frothy and increased in volume. 
In another bowl, mix the flour, salt, and milk powder. Now make a well in the center and pour in the yeast and start mixing the flour and the yeast liquid. Once all the liquid is covered by the flour, start adding in water little atva time until all the water is used up (remaining 100 ml). With wholewheat breads we have to ensure that the dough is not dry but smooth and soft to the touch with slight traces of stickiness. A dry dough will result in a dry crumbly bread. 
Now transfer the sticky dough to a clean and floured work surface and using both your hands, start kneading with all your might till all the stickiness is gone. This will take 5-7 minutes. Now spread out the dough and splash 1 tbsp butter/margarine and fold in. Continue kneading till the butter is absorbed. Do not be tempted to add extra flour. Just keep kneading and in mo time the stickiness will be gone. Now add the remaining 1 tbsp butter and knead again till you have an incredibly soft and elastic dough. Congratulations! You are 70% done!!
Niw oil a big enough bowl to hold the doubled up risen dough and also oil the dough. Gently place it into the oiled bowl and keep covered in a warm place for 1- 11/2 hour till doubled in volume. 
Once doubled, punch down the dough and knead for 3-5 minutes to bring the dough into a uniformly shaped loaf. Grease a loaf tin and place the shaped loaf in it. Cover again and leave to rise for another 1 hour. 
Towards the end of the second rise, start preheating the oven at 180 degree celcius and also keep a small tray of water to build up steam. 
Brush the top of the loaf gently with milk (room temperature) taking care not to deflate the dough. Bake in the preheated oven for 20-25 minutes till you get a dark brown top and the bottom sounds hollow when tapped. 
Remove from the pan immediately and brush the top with butter. Cool completely on a wire rack before slicing. 


Tuesday, 8 September 2015

Eggless Butterless Chai Cupcakes

My new bake book that I recently bought at the Bali Airport is quite an interesting read. This is the third recipe that I have tried and has amazed me once again. The best part about this book is that there are ample recipes which are eggless and butterless for regular baking as well as exotic recipes for those special days. I will keep posting my experiments here and you can try them as well in your kitchens!!
P.S.: Recipe inspired from Bake Happy by Judith Fertig
Ingredients 
1/2 cup boiling water 
1 tea bag or 1 tbsp good quality tea leaves
1 3/4 cup all purpose flour 
2 drops chai masala drops or 1 tsp ground cinnamon, 1/2 tsp ground ginger, 1/2 tsp ground green cardamom, 1:4 tsp ground nutmeg 
1 tsp baking powder 
1/2 tsp baking soda 
1/2 tsp fine salt 
1/2 cup milk (can be replaced with almond milk/soy milk for vegan options)
1 tbsp cider vinegar or balsamic vinegar 
1/2 cup brown sugar 
1/3 cup extra light olive oil or similar 
2 tsp vanila extract 

Direction 
Preheat the oven to 180 degree celcius. Line a muffin tray with cupcake liners and keep aside. In a small saucepan, brew the tea bag/tea leaves in hot water and keep covered for 15 minutes. Do not leave the stove on while brewing. Else, the tea will get bitter.  Let it cool. 
In a medium bowl,sift together the flour, baking powder, baking soda, sugar, salt, and the spices (if not using the spice drop). In a separate large mixing bowl, stir together the milk, brewed and cooled tea, and vinegar. Allow the mixture to sit for 1 minute and then mix in the oil and vinegar and the spice drop (if not using the ground spices). 
Now whisk the flour mixture into the milk mixture, one-third at a time. Keep whisking until the batter becomes smooth and starts to thicken. 
Pour the batter upto 1/3 of the liners and bake in the preheated oven for 15-20 minutes or until a toothpick inserted comes out clean. Remove the cupcakes from the oven and set the pans on wire racks to cool completely. 


Friday, 26 June 2015

Baked Doughnuts

Somethings have to just wait for the right time just like my doughnut pan which I had bought almost 2 years back and since then had been patiently waiting in my archives to be used someday!!! I really regret for keeping it waiting for so long. But as they say, better late than never!! Der aaye Durust aaye!! I am loving it. Another successfully acquired baking gadget!! Yippee!! 
Ingredients 
1 cup flour 
3/4 tsp baking powder 
1/4 baking soda 
1/2 tsp salt
1/3 cup brown sugar 
2 tbsp butter melted
1 large egg
1 tsp Vanila essence 
1/2 cup buttermilk 

Direction 
Mix the flour, baking powder, baking soda, salt and sugar in a bowl and keep aside. 
Whip the egg, buttermilk, vanilla essence, and cooled and melted butter. Add the dry ingredients into the wet and mix well. Ensure there are no lumps while taking care at the same time that no lumps remain. 
I am using my doughnut maker but you can use a regular baking tray and keep a small piping nozzle in between to make the hole and keep it there while baking. Make sure however that you use the aluminium ones instead of the plastic ones or anything which helps you to keep the doughnuts in shape. If using the oven , pre-heat to 190 degree celcius and bake in the pre-heated oven for 8-10 minutes. Do not overbake. 
If using the doughnut  maker, pre-heat  it before using and then pour 1 -2 tsp of the batter into the holes and close the lid. Bake till golden on one sude and then flip and bake for 2-3 minutes more. 

Let them cool on a wire rack. Meanwhile, prepare the ganache. I used unused regular chocolates lying in the fridge and melted them. Added cream to a consistency I desired and added 1 tsp honey to make it glossy. Once cooled, dip the doughnuts top side down into the 
Chocolate ganache and let it set for 30 minutes before serving. 


Tuesday, 23 June 2015

Citrus Biscotti

I am in love with citrusy flavors and this biscotti reinstates my love. It is bursting with an addictive citrus flavor right from the time you put it in the oven to when you take it out and take an irresistible bite into this crispy crunchy breakfast delight. It turned out more crumbly than I expected but nevertheless, I am not complaining. I love the crumbs as much as the biscotti. Twice baked, these are easy to assemble and handle and are a great breakfast with a hot cup of coffee and some muffins!! If you are watching your calories and yet craving for some baked delight, then this is what you should bake. With just 1 tbsp oil, a breakfast or any snack time cannot get any yummier than this!! 
Ingredients 
1 3/4 cup plain flour plus more for dusting
1/2 cup fine sugar
1 tsp baking powder 
2 eggs
1 tbsp oil (I used extra light olive oil)
1 1/2 tbsp citrus zest (I used a mix of lemon and orange zest; you can use whatever you have at hand)
1 tbsp lemon juice ( orange juice will work equally well)
1 tsp lemon/orange essence (if using orange juice, use orange essence and likewise for lemon essence)
Sliced pistachios for topping (optional)

Direction 
Mix the flour, sugar, and baking powder in a bowl. In another bowl, mix the eggs, zest, essence, oil and lemon/orange juice. Now add the flour little at a time and mix with every addition. When it gets difficult to move the spoon, transfer the dough to a floured surface and with your hands lightly knead the dough for a few minutes and form a log. If the dough gets too sticky, add some flour 1 tbsp at a time till it is smooth and non sticky. 
Grease a baking tray and line it with parchment paper and grease again. Place the log on the greased plate and top it with sliced pistachios (or almonds). The taste of toasted nuts is too good to resist. 
Bake in a pre-heated oven at 175 degree celcius for 20-25 minutes till browned on top. 
Cool on a wire rack for 10 minutes. Now with a serrated knife, slice the loaf. Place it on the baking tray sliced side up and put it back into the oven for 10 minutes. Now, take it out and flip sides and put it back again for another 5 minutes. Your yummy crunchy biscottis are ready to be devoured. If they become soft the next day, you can pop them back into the oven for a few minutes till they are crunchy again!! Enjoy!!


Monday, 15 June 2015

Chocolate Orange Marble Cake

It's holiday time again and this time we are visiting the beautiful country of Taiwan. It's a short 4 day trip but mostly on the move. As such it's imperative to carry as much finger food and snacks as possible. With a toddler on board, hunger pangs can strike anytime and anywhere. Being prepared is a wise thing to do as such. Keeping my little one's and my preferences in mind, this chocolate orange marble cake has been baked and packed for this exciting and adventurous trip. See you all soon with more recipes and chit chat.... Till then, take care and lot of love!! 


Ingredients 
1/2 cup butter
3/4 cup sugar
2 eggs (you can increase this to 3 as well; I fell short of 1 egg but feel it will taste even better with an additional egg)
2 tsp orange essence (you can also substitute with vanilla essence)
100 ml orange juice (fresh is best, but canned will work as well)
1 tsp baking powder 
1/2 tsp baking soda 
50 ml milk
2 cups flour 
1 1/2 tbsp cocoa powder 
1 1/2 tbsp orange zest (peel the skin of oranges with a peeler and cut it very fine; you can also use candied orange peel chopped very fine or dried orange peels)

Direction 
If using fresh orange, peel and cut the zest and keep aside and juice the orange. 
In a bowl, cream the butter and sugar together. Add the eggs one at a time and whip till smooth and creamy. Add the orange/vanilla essence (I strongly recommend using orange) and the orange juice. Whip further for a minute. Now add the flour mixed with the baking powder and baking soda alternating with the milk. Stir well till no lumps remain. Now divide the batter into two equal or unequal portions and mix in the cocoa powder into one (I mixed into the one with more quantity) and orange zest into the other. In case you do not have access to orange zest (either fresh or candied or dried) you can skip it. However, you must add the orange essence then in the first step to achieve the perfect orangey flavor. 

Pre-heat the oven at 180 degree celcius for 10 minutes. Now take a 8" round pan and spray with cooking spray. Line it with parchment paper and spray again. This helps in easy release of the baked cake. Now alternately spread the two batters in whatever pattern you wish to. With the help of a long skewer or toothpick, make swirls in the batter to help form a pattern inside. 
Now bake in the pre-heated oven for 25-30 minutes or till a toothpick inserted comes out clean. Remove from the oven and let it cool in the pan for 10 minutes before transferring to a wire rack for cooling completely. Store in air tight containers once sliced. 


Tuesday, 26 May 2015

Biscuit Chocolate Cupcakes

This month has really been a very slack one in terms of getting orders. With more time at hand, I thought of putting it to good use and trying some new experiments in the kitchen. Today's recipe is a shot in the dark which hit the target very aptly. A crunchy buttery biscuit base with a soft and moist chocolate cake on top and some chocolate chips to finish it off made it quite a bite!! The recipe makes exact 12 cupcakes and are great for a mid-week treat!
Ingredients 
150 gms all purpose flour
1 1/2 tbsp cocoa powder (I used extra dark cocoa powder and so used only 1 tbsp)
1 tsp baking powder 
75 gms butter room temperature 
90 gms brown sugar (white is also fine)
2 eggs
1/4 tsp salt if using unsalted butter 
1 tsp Vanila extract 
70 ml milk
Chocolate chips to sprinkle 
For the base 
7-10 biscuits (anything that is lying unused in your pantry)
1 tbsp butter melted

Direction 
Start with the base. Crush the biscuits in a blender and add the melted butter. Grind together to form a wet sand like texture. 
Now fill in the cupcake liners till about 1/4 of the liner and press down the top with a spoon to get a smooth top. Refrigerate while you prepare the batter. 
In a bowl sift together the flour, cocoa powder and baking powder. Keep aside. 
Cream the butter and the sugar in a separate bowl. Add the eggs one at a time and beat further. Add the vanilla extract and whip. Now add the flour and milk alternately beginning and ending with flour. Whip well till all is incorporated well. 
Pre-heat the oven at 180 degree celcius. 
Now take the chilled cupcake liners out of the refrigerator and add equal spoonfuls of the batter into the liners till about 3/4 full. Place them in a muffin tray and sprinkle the top with chocolate chips, as many as you like. 
Bake in the pre-heated oven for 20 minutes or until a toothpick inserted comes out clean. Remove from oven and let it cool in the pan for 10 minutes and then transfer to a wire rack to cool completely. 


Friday, 27 March 2015

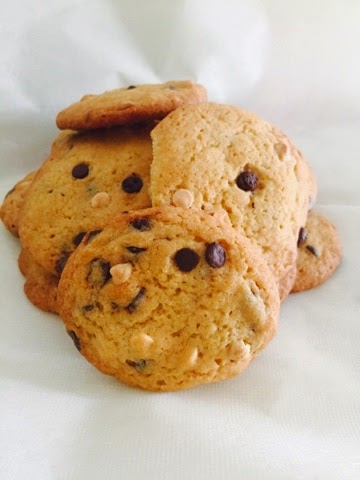
Chocolate Chip Cookies-- The Traditional Way

Chocolate Chip Cookies are a native of America and while there have been many variations to the recipe including the addition of oatmeal or nuts or different kinds of chocolate chips, the cookie still remains one of the most delicious cookie ever baked. There is very little chance that you can go wrong with this recipe as it is so easy and quick and by the time you realize, you will already be biting into a piece of warm crispy crunchy edged soft and buttery cookie!! Mmmmmmm....
Recipe adapted from Joy of Baking
Ingredients 
1 cup butter room temperature but not melted 
3/4 cup white sugar
3/4 cup brown sugar
2 eggs
11/2 tsp Vanila extract 
1 tsp baking soda
1/2 tsp salt
1/2 tsp cream of tartar (optional)
2 1/4 cup flour
1 1/2 cup chocolate chips(I used a mix of white and brown)
You can add any chopped nuts of your choice optionally 

Direction 
Cream the butter and sugar together till smooth. Add the eggs one at a time, beating after each addition. Add the vanilla extract and beat. Sift the flour, salt and baking soda. Add it to the butter mixture and fold in. It is advisable not to use the electric beater at this stage. Lastly add the chocolate chips and any chopped nuts if you are using. Mix well. 
Pre-heat the oven at 180 degree celcius and line a baking tray with parchment paper. With the help of an ice cream scoop or a tablespoon, drop half scoops into the prepared tray. Two things to note here. Firstly, do not flatten the balls. Doing so, you will end up with joined edges as the cookies will flatten out on their own while baking. Secondly, do not place the cookies too close to each other. You can bake the cookies in batches and keep the dough covered in the refrigerator while one batch bakes. Over crowding will ruin the shape of your cookies. Lastly, bake fewer cookies in the first batch so that you get an idea on the perfect quantity of dough to be put in the tray and the spacing to get those perfectly rounded cafe like cookies. 
Once you have arranged all the dough balls in the tray, top it up with some more chocolate chips and bake in the pre heated oven for 10-12 minutes. The subsequent batches will take lesser time and so keep a close watch. Remove the cookies from the oven when you gently press down on a cookie and it springs back. Cool on a wire rack completely before transferring to air tight containers. While baking the subsequent batches, let the baking tray cool down completely (if you do not have a spare one) before putting in the next batch of dough balls. 


Thursday, 19 March 2015

Baked Stuffed Flower Bread

Breakfast never excites me for the simple reason that I do not want to stress myself with what different to serve to my family which they will happily eat. When it comes to lunch and dinner, you get ample time to think and prepare while breakfast gives you hardly any time to think when you are still unreeling from your last night's dream. However, there are some really interesting and exciting breakfast ideas which can get you going even early in the morning. Today's recipe is a makeover of our very own Bread Pakora with the only difference that it is healthier with no deep frying involved and no mess at all. You can get this ready in just under 15 minutes. Now isn't that a cool breakfast idea!!
Ingredients 
Slices of leftover bread, as many servings as you want
Stuffing of your choice (I used a stuffing of mashed and cooked cauliflower, potatoes and carrots dry sabji from last night's dinner)
Butter as required 
Cheese for topping 

Direction 
Take a bread slice and with the help of a rolling pin, thin it out. 
Now spread butter thinly on both the sides. Make cuts starting from the corner and stopping slightly away from the centre. Repeat for all the corners. 
Place a dollop of the stuffing in the center of the bread slice. 
Lift up the edges gently without breaking and form a cup. 
Place the bread cup on a muffin tray (not required to grease) and top it with some cheese. 
Repeat for all the other bread slices. 
Now bake in a pre-heated oven at 175 degrees for 7-10 minutes till the bread is crispy from the edges and the cheese melted. I switched on the top rod only for thr final few minutes to speed up the process. 
Serve hot!!

Monday, 1 December 2014

Eggless Wholewheat Spiced Muffins with Flaxseed

Eggless baking is quite a challenge for a baker who does not have any restriction of baking with eggs. However, the question is often raised regarding the appropriate egg substitute. While I have done some eggless baking with yogurt and the results were also fantastic, flaxseed powder is an alternative that bakers usually suggest and which I had never tried. So today as I was standing in my kitchen wondering what to bake for my week's breakfast, I decided to experiment with this egg substitute. I have used all least expensive and simple ingredients in this recipe as I was not too sure of the results and was all set to trash it if required. You can use this as a base recipe and modify the recipe with ingredients of your choice. The texture and taste was at par with any other bake made with eggs and after tasting cakes made with yogurt, I would definitely recommend using flaxseed powder as a substitute instead of yogurt. 

Ingredients
1 cup plus 1 tbsp wholewheat flour
1/3 cup honey (I added 1/4 cup honey and realized it wasn't too sweet)
1/4 cup extra light olive oil
2 tbsp flaxseed powder (I am substituting 2 eggs with 2 tbsp flaxseed powder)
1/4 cup milk
1 tsp vanila extract
2 tbsp candied citrus peel chopped (optional)
1 tsp baking powder
1/2 tsp baking soda
2 tsp mixed spice
1 tsp or more ground cinnamon for sprinkling

Direction
Take 6 tbsp room temperature water and dissolve the 2 tbsp flaxseed powder. Let it stand for 3-5 minutes. 
In a bowl, beat the honey and oil till smooth and creamy. Add the vanila and stir. Now mix the flaxseed mixture, which would become gooey by now, and stir well till incorporated. Now fold in the 1 cup flour mixed with the baking powder and baking soda and stir till no lumps remain. Add the milk and add the remaining 1 tbsp flour. Mix well. You may add another 1/2-1 tbsp flour if you find the batter too runny which should otherwise be lumpy and drop consistency. Add the chopped citrus peel and mixed spice and stir well till combined. 
Pre-heat the oven at 180 degree celsius. Line a muffin tray with liners and drop spoonfuls of the batter till 3/4 full. The batter rises beautifully and so leave enough space for the muffins to rise. 
Sprinkle ground cinnamon on top of each muffin and bake in the pre-heated oven for 15-20 minutes till a toothpick inserted comes out clean and the top is slightly golden. Remove from oven and let it cool in the pan for 10 minutes. Transfer to a wire rack and cool completely before storing in air tight container. Serve warm with a dollop of butter and some fruit preserve. Enjoy!!


Monday, 10 November 2014

Cranberry-Orange Wholewheat Oatmeal and Wheat Germ Muffins

Just as weekend means indulgence, the week means restriction at my household. Restriction not in terms of food or taste but in terms of bad calories and unhealthy food. While you can manage to restrict your diet during the three main meals, the mid-mornings and tea-times are the hardest to resist and that is where the trick to healthy eating lies. I bake a healthy munch on every week to help me get rid of my cravings as well as keep a watch on the calorie intake and nutrition level. When on a restricted diet, you are most likely prone to miss out on essential nutrients (especially for a non-fruit eater like me), and bakes such as these help me fill up the gap. Try these muffins if you like to bite into a little something with your cuppa and enjoy it guilt-free. 


Ingredients
1/2 cup raw wheat germ
1/2 cup oatmeal, lightly roasted and ground
1 cup wholewheat flour
1 tsp baking powder
1/2 tsp baking soda
1/4 tsp salt
1/2 cup dried cranberries
3/4 tsp mixed spice (you can use a mix of ground cinnamon and nutmeg; I used storebought mixed spice)
3/4 cup packed brown sugar
2 eggs
1/2 cup orange juice (I used canned)
1/4 cup extra light olive oil (you can use canola oil as well)
1 tsp grated orange rind (I used  yellow lemon rind as I did not have fresh oranges at hand)

Direction
Mix the flour, oatmeal, wheat germ, baking powder, baking soda, salt, and mixed spice and keep aside. 
In another bowl, whip the sugar, oil, orange juice, eggs, and lemon/orange rind till smooth. Fold in the flour mixture until just combined. The batter will not be runny but slightly lumpy. 
Pre-heat the oven at 175 degree celsius. Line a 12-hole muffin tray with paper liners and drop a spoon full of the batter till about 3/4th of the cup. Even out the top and continue for the rest of the batter. Bake in the pre-heated oven for 20-25 minutes till a toothpick inserted comes out clean and the top is nicely golden. If the top browns faster than the muffin being baked, lower the temperature to 160 degrees to avoid burning. Remove from oven when done and let it cool in the pan for 5 minutes. Transfer to a wire rack to cool completely before storing it in air tight containers. Re-heat the muffins for 10 secs in the microwave before serving for best results.