Showing posts with label snacks. Show all posts

Monday, 11 January 2016

Shortbread Chocolate Chip Cookies

First of all, a very happy new year to all my readers. I know I am quite late in wishing but due to health reasons I was quite tied up in the first week of the month. Nevertheless, I couldn't stay away too long from blogging and cooking and so with a very dear friend visiting us this week, I thought it was the perfect time to get back to routine and bake some yummy cookies for them to enjoy with their tea and coffee. These cookies are amazingly easy and eggless too!! You must try these if you have been looking for a quick way to heaven!! 

Ingredients 
1 cup butter, just soft enough to beat but not melted
1/2 cup sugar 
2 cups all purpose flour
1 1/2 tsp lemon extract (you can use Vanila, orange, or any flavor of your choice)
Chocolate chips for the toppings 

Direction 
Best the butter and sugar together until fluffy. Now add the extract and beat for a second. Lastly add the flour little at a time and beat until incorporated. You may use your hands at this time instead of the beater. 
Pre heat the oven at 175 degree celcius and line a baking tray with parchment paper. With the help of an ice cream scoop, scoop out small portions of the dough and drop on the prepared baking sheet. Once you have spaced all the cookies 1" apart, using your hands, smooth the cookie drops to an even top and sprinkle some chocolate chips on top. Bake in the pre heated oven for 12-15 minutes till the bottom is slightly golden and the tops spring back lightly when gently pressed. Remove from oven and let them cool in the tray for 5 minutes before transferring them to a wire rack to cool completely. Store in air tight containers. 

Monday, 5 October 2015

Hara Bhara Kabab

Probably the most popular vegetarian kababs, these are packed with nutrition and yet so easy to make. These are great served hot from the pan to enjoy the crunchy crust and soft inside. Serve these with a sprinkle of chaat masala and a fierry green chutney or sliced onions with a squeeze of lemon. Just yumm!!

Ingredients 
200 gms spinach, stems removed 
1/2 cup green peas
2 large potatoes boiled
1 tbsp ginger garlic paste
2 tbsp gram flour or besan
1 tsp red Chilli powder 
1 tsp cumin powder 
1/2 tsp chat masala or more to taste
Salt to taste 
Oil to fry

Direction
Boil the peas and potatoes till soft. Drain and keep aside. 
Blanch the spinach and squeeze excess water and finely chop. 
In a bowl, mash the potatoes and peas with a potato masher as fine as you can and add the chopped spinach. Add all the dry spices, ginger garlic paste, and besan and mix well. If your spinach wasn't squeezed well and there is still excess moisture, you can add 1 tbsp more besan and mix. Now pinch out small quantity and make a small smooth ball and flatten it with your palm. Arrange on a plate and repeat for the rest of the mixture. 
Now heat a grill pan and fry the kababs, with a little drizzle of oil, till golden on both the sides. Serve hot!!


Thursday, 17 September 2015

Golden Baked Coconut Macaroons

Coconut is a very versatile fruit and it adapts itself to any dish very skilfully. Be it sweet or savory, a dip or a complete maincourse dish, the coconut always lends a lingering flavor to the recipe and makes it distinct and memorable. These macaroons are no less. Not only they are a weight watcher's delight with no flour or butter in its making, they are also easy to make and require just three main ingredients and are incredibly light and delicious to eat that you won't even realize when you emptied an entire batch. 
P.S.: Recipe adapted from Once Upon A Chef with some changes
                                   
Ingredients
390 gms grated coconut (I used fresh coconut but you can use dried coconut as well available in the bakery section of grocery stores)
Scant 1 cup low fat condensed milk (or regular is fine too)
1 tsp vanila extract
2 large egg whites
1/2 tsp salt

Direction
Start by dry roasting the coconut on the stove top in a pan. You may skip this step if you are using dried grated/dessicated coconut. Freshly grated coconut has a lot of moisture and hence needs to be lightly roasted to avoid a liquid batter. Dry roast the coconut till the moisture has evaporated and the coconut feels dry to the touch. Take care not to burn the coconut. Remove from stove and let it cool completely before proceeding to the next step. 
                                     
Preheat the oven at 175 degree celsius and keep a baking tray ready lined with parchment paper. 
Now, mix the condensed milk (make sure you use a little less than 1 cup) and the cooled and roasted coconut. Add the vanilla and mix and keep aside.
Now whip the egg whites with the salt till stiff peaks form. Fold in this into the coconut mixture and mix. Ensure that you only do gentle folding without flattening out the foam. 
                                      

Now take heaped tablespoons of the batter and drop them into the prepared baking tray. You might notice some liquid releasing from the batter. Try and avoid adding the liquid as you might have a burnt base if you add that, like I have in my first batch. You do not have to squeeze out the liquid, but instead just avoid scooping it into the tablespoon. Scoop more solids than liquid! Place the scoops one inch apart.
                                     
Bake in the preheated oven for 20 minutes till the base and top are deep and slightly golden respectively. I like mine to be nicely golden on the top and so kept a few minutes longer. You can bake as you like yours to be. The cookies will be soft and chewy from inside and while baking they will still be soft to the touch. That's the way they are supposed to be and so do not worry about uncooked cookies.
                                       
Once done, remove from the oven and let them cool in the tray for a minute before transferring them to a wire rack for cooling completely.
                                     
I baked in three batches and got a total of around 36 cookies or maybe more as I could not count properly due to my constant munching. :D You can also dip these cookies halfway through into melted chocolate and then chill them for a few minutes or drizzle melted chocolate on the entire batch for a more indulgent bite!


Wednesday, 22 July 2015

Easy Chicken Kabab

Starters are an important part of any meal and they get even more important when you host a dinner/lunch event at your place. Having said that, when you have no helping hand in the kitchen it becomes imperative that you present something quick and easy yet beautifully presented and delicious to eat. These Kababs are just that. Extremely easy to prepare, you can keep these ready one day in advance in the refrigerator and shallow fry just before serving. Serve it with some green chutney and be ready to amaze your guests!!
Ingredients 
500 gms minced chicken 
1 medium onion chopped finely 
1 tbsp ginger garlic paste 
2 tbsp fresh coriander finely chopped 
2 tbsp besan
1 tsp red chilli powder 
1 tsp garam masala powder 
2 tsp coriander powder 
Finely chopped green chillies (optional)
Salt to taste
Oil as required 

Direction 
Wash and drain the chicken mince. Ensure that there is no excess water. Now mix in all the other ingredients except the oil. Make a smooth mixture ensuring that everything is mixed well. You can now either go ahead and make patties out of this mixture or keep it in an airtight container in the refrigerator until ready to use. 
When ready to fry, heat oil in a frying pan or grill pan and make small patties out of the mixture and fry till golden on both sides in a medium heat. I covered the pan on a medium heat for the first five minutes to ensure that the chicken is cooked through. After 5 minutes, remove the cover and fry on a medium high heat till golden on both the sides. Drain the excess oil on a kitchen towel. Sprinkle some chaat masala if you like and serve hot with your favourite chutney. 


Friday, 26 June 2015

Baked Doughnuts

Somethings have to just wait for the right time just like my doughnut pan which I had bought almost 2 years back and since then had been patiently waiting in my archives to be used someday!!! I really regret for keeping it waiting for so long. But as they say, better late than never!! Der aaye Durust aaye!! I am loving it. Another successfully acquired baking gadget!! Yippee!! 
Ingredients 
1 cup flour 
3/4 tsp baking powder 
1/4 baking soda 
1/2 tsp salt
1/3 cup brown sugar 
2 tbsp butter melted
1 large egg
1 tsp Vanila essence 
1/2 cup buttermilk 

Direction 
Mix the flour, baking powder, baking soda, salt and sugar in a bowl and keep aside. 
Whip the egg, buttermilk, vanilla essence, and cooled and melted butter. Add the dry ingredients into the wet and mix well. Ensure there are no lumps while taking care at the same time that no lumps remain. 
I am using my doughnut maker but you can use a regular baking tray and keep a small piping nozzle in between to make the hole and keep it there while baking. Make sure however that you use the aluminium ones instead of the plastic ones or anything which helps you to keep the doughnuts in shape. If using the oven , pre-heat to 190 degree celcius and bake in the pre-heated oven for 8-10 minutes. Do not overbake. 
If using the doughnut  maker, pre-heat  it before using and then pour 1 -2 tsp of the batter into the holes and close the lid. Bake till golden on one sude and then flip and bake for 2-3 minutes more. 

Let them cool on a wire rack. Meanwhile, prepare the ganache. I used unused regular chocolates lying in the fridge and melted them. Added cream to a consistency I desired and added 1 tsp honey to make it glossy. Once cooled, dip the doughnuts top side down into the 
Chocolate ganache and let it set for 30 minutes before serving. 


Monday, 15 June 2015

Chocolate Orange Marble Cake

It's holiday time again and this time we are visiting the beautiful country of Taiwan. It's a short 4 day trip but mostly on the move. As such it's imperative to carry as much finger food and snacks as possible. With a toddler on board, hunger pangs can strike anytime and anywhere. Being prepared is a wise thing to do as such. Keeping my little one's and my preferences in mind, this chocolate orange marble cake has been baked and packed for this exciting and adventurous trip. See you all soon with more recipes and chit chat.... Till then, take care and lot of love!! 


Ingredients 
1/2 cup butter
3/4 cup sugar
2 eggs (you can increase this to 3 as well; I fell short of 1 egg but feel it will taste even better with an additional egg)
2 tsp orange essence (you can also substitute with vanilla essence)
100 ml orange juice (fresh is best, but canned will work as well)
1 tsp baking powder 
1/2 tsp baking soda 
50 ml milk
2 cups flour 
1 1/2 tbsp cocoa powder 
1 1/2 tbsp orange zest (peel the skin of oranges with a peeler and cut it very fine; you can also use candied orange peel chopped very fine or dried orange peels)

Direction 
If using fresh orange, peel and cut the zest and keep aside and juice the orange. 
In a bowl, cream the butter and sugar together. Add the eggs one at a time and whip till smooth and creamy. Add the orange/vanilla essence (I strongly recommend using orange) and the orange juice. Whip further for a minute. Now add the flour mixed with the baking powder and baking soda alternating with the milk. Stir well till no lumps remain. Now divide the batter into two equal or unequal portions and mix in the cocoa powder into one (I mixed into the one with more quantity) and orange zest into the other. In case you do not have access to orange zest (either fresh or candied or dried) you can skip it. However, you must add the orange essence then in the first step to achieve the perfect orangey flavor. 

Pre-heat the oven at 180 degree celcius for 10 minutes. Now take a 8" round pan and spray with cooking spray. Line it with parchment paper and spray again. This helps in easy release of the baked cake. Now alternately spread the two batters in whatever pattern you wish to. With the help of a long skewer or toothpick, make swirls in the batter to help form a pattern inside. 
Now bake in the pre-heated oven for 25-30 minutes or till a toothpick inserted comes out clean. Remove from the oven and let it cool in the pan for 10 minutes before transferring to a wire rack for cooling completely. Store in air tight containers once sliced. 


Tuesday, 9 June 2015

Zucchini Mozarella Tart with Sundried Tomatoes

When I was planning my all Italian dinner last week, the dish that troubled me most was this tart. With the restriction of making it eggless, I was completely clueless and could hardly find any ideas which would give the tart some body and not make it look like a pizza. I remembered a tart I had at my Dutch friend's house and I got in touch with her. She was kind enough to help me with the recipe and everything else just fell in place. It was so wonderful to see my guests enjoy the menu and I just couldn't stop feeling proud of myself. 
Ingredients 
1 9" pie crust (I used storebought pie crust mix)
1 block of Mozarella cheese (I used Gouda cheese as I had a block lying with me but mozzarella works equally fine)
1 zucchini cut into thin slices 
1 medium onion thinly sliced 
1/4 cup Sundried tomatoes drained 

Direction
Blind bake the pie crust as per the packet instructions. Blind baking is baking the rolled out dough fitted in the tart pan and pricked with a fork all over so that it doesn't rise up. You can also place a heavy weight like uncooked rajma, chick peas etc. 
Now let the pie crust cool completely before filling. Once cooled, grate the gouda/mozzarella cheese and spread all over the base covering all the corners. Now place the zucchini in circles starting from the outside. Now spread the onion slices similarly in between the zucchini and follow with the Sundried tomatoes and freshly chopped parsley. Finally, cover with another layer of grated Mozarella/gouda cheese and bake in the pre-heated oven at 200 degree celcius for 15-20 minutes till the cheese is melted and slightly golden and the zucchini softened. Keep the tart inside the oven for 5 more minutes after switching off so that the zucchini gets cooked without burning the cheese. 
Serve hot!


Sunday, 7 June 2015

Risotto Cheese Balls or Arancini

Arancini is a very Italian snack which is traditionally served on December 13 in eastern Sicily for the feast of Santa Lucia when bread and pasta are not eaten. The dish is believed to have been originated in Sicily in the 10th century when the Arabs ruled. Ever since it has become very popular and now it is served all year through at all Italian joints and is a scrumptious snack to start any party with. Last weekend I decided to go all Italian with my guests and chose the Arancini to start my party with. Since I did not have any Risotto (Italian rice) with me nor did I wish to buy, I substituted it with our regular small grain aromatic rice. I was a bit skeptical about the results but when I saw my guests devouring them, all my fears were put to rest. Serve these with your favourite dip and see your friends and family enjoy them heartily!!
Ingredients 
2 cups risotto or small grain rice (I used aromatic jeera rice)
1/4 cup breadcrumbs (I used Italian seasoned) plus more to coat
2 eggs
1 tbsp garlic finely chopped 
1/2 cup parmesan cheese
1 medium onion chopped 
1/2 cup mushrooms sliced 
1 tsp basil
1 tsp oregano 
1 tbsp fresh parsley (or 1 tsp dried parsley)
Salt and pepper to taste
Mozzarella or cheddar cheese cut into small cubes for filling 
1/2 tbsp olive oil plus more for frying 

Direction 
Cook the rice or risotto until 90% done. Do not overcook. Drain and keep aside to cool. 
Meanwhile heat oil in a pan and add the garlic. Fry till slightly browned and then add the chopped onions and fry till soft. Now add the mushrooms and sauté till all the moisture dries up and the mushrooms are slightly browned. Take care that there is no water left from the mushrooms. Let it cool. 
In a bowl, take the cooled rice, mushrooms, breadcrumbs, parmesan cheese, herbs, fresh and dry, eggs, and salt and pepper and mix well. If you find the mixture too wet, you can add 1 tbsp breadcrumbs more. However take care not to add too many crumbs as the mixture will taste doughy. Make small balls from the mixture and then make a small hole and place a cube of cheese inside and seal from all sides. Roll the ball on a plate of breadcrumbs and arrange on a plate. Repeat with the rest of the mixture. Refrigerate for 30 minutes. 
Heat oil in a pan and fry the balls till golden on all sides. Drain the excess oil on kitchen towels and serve with your favourite dip. 


Saturday, 6 June 2015

Garlic Knots

Bread baking is a superb stress buster and very satisfying too. When you see your ball of dough puff up like a mountain in the first rise, your chest also doubles up equally with joy in anticipation of eating something awesomely yummy fresh and hot from the oven. I had hosted an all Italian dinner at my place this weekend and to make it even more enticing, I decided to bake my bread at home to compliment my Lasagna. The bread superseded my expectations in every way right from the first rise, the oven spring to the cottony soft texture!! My happiness knew no bounds and even more so when my guests couldn't stop praising my efforts and the food. 

Ingredients 
3 cups all purpose flour (I used bread flour but APF works equally well)
2 1/4 tsp active dry yeast 
1 tbsp sugar
1 tsp salt 
3/4 cup warm water plus 1/2 cup for kneading 
2 tbsp butter softened 
For the garlic wash
1 tbsp butter
2 tbsp olive oil
1-2 tbsp garlic finely chopped (depending in how garlicky you want your knots)
2 tbsp parsley finely chopped 

Direction 
Dissolve the yeast in 3/4 cup warm water (43.3 degree celcius to be precise or till you are able to bear a drop of water on the back of your wrist) and sugar and let it stand till frothy and doubled in volume. 
Mix the flour and salt and add the frothy yeasty liquid to it. Mix with your hands or a spoon until the flour just comes together. It is not required that it forms a dough at this point. Cover and let the dough hydrate for 15 minutes. 

Now add the remaining water little at a time and start kneading the dough. Once the dough starts coming together, transfer to a clean kitchen counter or silicon mat and knead with the heels of your hands till the stickiness of the dough is almost gone. Now flatten the dough slightly with your hands and put 1 tbsp butter on the flattened base and fold in. Bang, fold, and knead the dough with all force till the butter is all absorbed and the dough is smooth with no stickiness. Again roll out the dough with the hands and apply the remaining butter and fold, bang, fold and knead like before till the dough is smooth to touch and and soft and elastic. Oil a bowl and transfer the dough to the bowl and grease it too. Cover and let it rest either in one corner of the kitchen counter or inside the microwave (basically a warm and humid place) until doubled in volume. 
Now deflate the dough and punch down the dough for 2-3 minutes. Line a baking tray with parchment paper and divide the dough into two. Keep one part of the dough in the bowl covered while working on the other. Using a rolling pin, roll out the dough into a circle of 1/3" thickness. With the help of a knife cut long strips. 

Pick one strip and make a knot (bring both ends together and then push one end into the circle making a knot). Place it on the prepared baking tray. 
Repeat with the rest of the strips and the dough. Place the knots 1" apart as you keep them covered in a warm place for their second rise, about 1 hour or until doubled in size. Singapore is quite hot and humid these days and so it took me just 45 minutes in both the proofings for the dough to rise. 
Pre-heat the oven 20 minutes before the end of the second rise at 225 degree celcius. Now make the garlic wash. Melt the butter and oil together on the stove top and add the garlic. Stir for a minute and then remove from heat and add the parsley. Stir and cool it to room temperature. Now brush the cooled garlic wash generously (but gently) on the puffed up knots. Take care not to deflate the risen knots by hard brushing or hot garlic wash. 
Bake in the pre-heated oven at 200 degree celcius for 15 minutes or until golden on top and sounds hollow when tapped. Remove from the oven and brush again with the remaining garlic wash. Transfer to a wire rack and cool completely!


Wednesday, 27 May 2015

Spicy Tuna Fish in Vietnamese Rice Paper Wraps

I bought this packet of Rice paper wraps quite some time back but making it got delayed for some reason or the other. Yesterday when I invited my friend's Mom, who is visiting her these days, for high tea, I was quite confused whether to make some puffs (which are also lying in my freezer waiting to be used) or some fritters or simply buy something from the market. Just then I recalled that I have something new and interesting to serve. New ideas always excite me and I jumped on the idea. In no time, I quickly prepared the filling and started preparing the wraps. The best part is you can prepare these wraps quite ahead of time and they are absolutely stunning to present as a starter or a snack. I have used tuna fish as the filling here. You can use whatever your taste buds guide you to!! My guests loved it and I was a happy host. 
Ingredients 
For the filling 
1 can tuna fish flakes in light oil drained 
1 medium onion
1 large tomato 
1 tbsp chopped garlic 
1/2 carrot finely grated 
1/2 tsp dried basil 
1/2 tsp parsley
1 tsp cajun spice
Salt and pepper to taste 
2 tbsp spring onion greens plus more for garnish 
2 tbsp fresh coriander or parsley 
1 tbsp oil
For the wraps
4-5 vietnamese rice paper sheets
Water kept in a wide bowl or plate

Direction 
Heat oil in a pan. Add the garlic and sauté till light brown. Add the chopped onion and fry till translucent. Next tip in the tomatoes and grated carrots and stir. Fry till the tomatoes are mushy and the carrots soften. Now add the drained tuna fish flakes and stir well. Add all the spices and salt and stir till well combined. Add the spring onions and fresh coriander and stir. When oil starts separating from the sides, stir and remove from heat. Let it cool completely before you start making the wraps. 
For assembling the wraps, take a wide plate with raised edges and fill it with water. Wipe and clean the work table or kitchen counter. Take a rice paper and gently dip into the plate of water and swirl on all sides until the rice paper is soft enough to handle but not too wet. 
Place the softened rice sheet on the slab and place a spoonful of the filling on one side of the rice sheet. 
Now start wrapping it as shown in the pictures below. 

Fold in both the edges from the top and then roll the remaining edge. 
Place the wraps on a plate and repeat with the rest of the filling. Garnish with fresh spring onions and serve with your favourite dip.


Tuesday, 5 May 2015

Lemon Cake with Lemon Sugar Drizzle

Lemon cakes always sounded quite exotic to me and was synonymous with a cup of freshly brewed English Tea and a beachside villa with a stunning view of the sunset. I have had earlier attempts at making this cake but never succeeded until today including the frosting, which was an absolute shot in the dark as I wanted to experiment before my next order. The recipe was shared by a foodie friend after trying it out from Averiecooks.com and I just picked it up from there and added the frosting to make it more appealing and delicious. Lemon cakes, as easy as they sound, are sometimes quite tricky if you do not have the perfect recipe and rest assured, you can totally rely on this one for the most superbly moist and light lemon pound cake to enjoy your cuppa. So all the lemon lovers out there, do not miss out on this recipe 😋😋
Ingredients 
150 gms hung curd/greek yogurt
1/2 cup white fine sugar
1/4 cup light brown sugar (you can use all white sugar. I ran out of white but I think next time I will use all brown)
2 large eggs room temperature 
1/2 cup refined oil (I used rice bran oil. You can use any neutral tasting oil you like)
1 1/2 tbsp lemon extract (it is important not to use lemon juice or lemon oil here as the taste and texture might change)
2 tbsp lemon zest (it is a daunting task and the easiest shortcut is to thinly peel the outer lemon cover and grind it to as fine a powder as possible)
1 1/2 cup maida/all purpose flour (I used cake flour)
1/2 tsp salt
2 tsp baking powder (I used 1 tsp double acting baking powder)

For the frosting 
90 gms icing sugar
1 tbsp lemon juice 
Few drops of water, if required 

Direction 
Pre-heat the oven at 175 degree celcius and grease a 8" baking pan and line it with parchment paper. 
Sift the flour, salt, and baking powder and keep aside. 
Beat the sugar, eggs, and greek/hung yogurt till smooth and creamy. Add the oil while still whipping. The mixture should now be getting thicker and creamier. Follow this up with the lemon extract and lemon zest. Finally, add the flour in three batches, mixing well after each addition. Do not overmix though. Pour the batter into the prepared pan and bake in the pre-heated oven for 30-35 minutes or until done when a toothpick inserted comes out clean. 
Remove from the oven and let it cool in the pan for ten minutes and then cool on a wire rack completely. 
Once the cake has cooled down, take the icing sugar and the lemon juice and mix well. The mixture will resemble a thick creamy paste. You can add a few drops of water to it to slightly dilute it (remember, just a few drops!). Drizzle this on top of the cooled cake and let it set. It's okay if some of it drips down the sides. That's the lemon drizzle look!! Serve and enjoy it with your cuppa! 


Friday, 27 March 2015

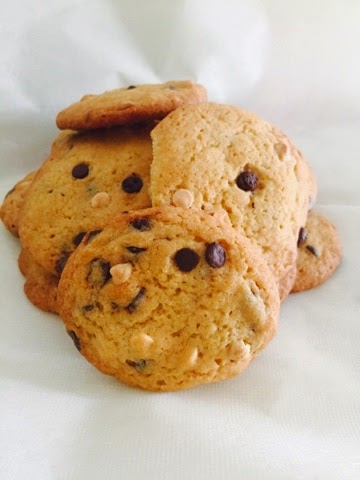
Chocolate Chip Cookies-- The Traditional Way

Chocolate Chip Cookies are a native of America and while there have been many variations to the recipe including the addition of oatmeal or nuts or different kinds of chocolate chips, the cookie still remains one of the most delicious cookie ever baked. There is very little chance that you can go wrong with this recipe as it is so easy and quick and by the time you realize, you will already be biting into a piece of warm crispy crunchy edged soft and buttery cookie!! Mmmmmmm....
Recipe adapted from Joy of Baking
Ingredients 
1 cup butter room temperature but not melted 
3/4 cup white sugar
3/4 cup brown sugar
2 eggs
11/2 tsp Vanila extract 
1 tsp baking soda
1/2 tsp salt
1/2 tsp cream of tartar (optional)
2 1/4 cup flour
1 1/2 cup chocolate chips(I used a mix of white and brown)
You can add any chopped nuts of your choice optionally 

Direction 
Cream the butter and sugar together till smooth. Add the eggs one at a time, beating after each addition. Add the vanilla extract and beat. Sift the flour, salt and baking soda. Add it to the butter mixture and fold in. It is advisable not to use the electric beater at this stage. Lastly add the chocolate chips and any chopped nuts if you are using. Mix well. 
Pre-heat the oven at 180 degree celcius and line a baking tray with parchment paper. With the help of an ice cream scoop or a tablespoon, drop half scoops into the prepared tray. Two things to note here. Firstly, do not flatten the balls. Doing so, you will end up with joined edges as the cookies will flatten out on their own while baking. Secondly, do not place the cookies too close to each other. You can bake the cookies in batches and keep the dough covered in the refrigerator while one batch bakes. Over crowding will ruin the shape of your cookies. Lastly, bake fewer cookies in the first batch so that you get an idea on the perfect quantity of dough to be put in the tray and the spacing to get those perfectly rounded cafe like cookies. 
Once you have arranged all the dough balls in the tray, top it up with some more chocolate chips and bake in the pre heated oven for 10-12 minutes. The subsequent batches will take lesser time and so keep a close watch. Remove the cookies from the oven when you gently press down on a cookie and it springs back. Cool on a wire rack completely before transferring to air tight containers. While baking the subsequent batches, let the baking tray cool down completely (if you do not have a spare one) before putting in the next batch of dough balls.