Showing posts with label Cakes. Show all posts

Monday, 15 June 2015

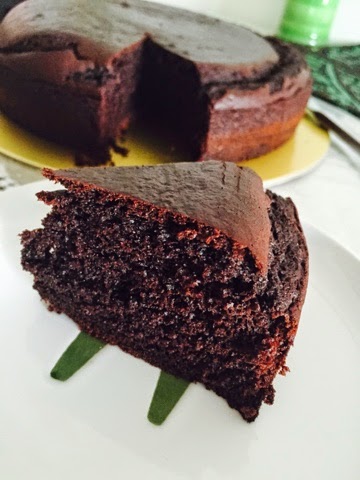
Chocolate Orange Marble Cake

It's holiday time again and this time we are visiting the beautiful country of Taiwan. It's a short 4 day trip but mostly on the move. As such it's imperative to carry as much finger food and snacks as possible. With a toddler on board, hunger pangs can strike anytime and anywhere. Being prepared is a wise thing to do as such. Keeping my little one's and my preferences in mind, this chocolate orange marble cake has been baked and packed for this exciting and adventurous trip. See you all soon with more recipes and chit chat.... Till then, take care and lot of love!! 


Ingredients 
1/2 cup butter
3/4 cup sugar
2 eggs (you can increase this to 3 as well; I fell short of 1 egg but feel it will taste even better with an additional egg)
2 tsp orange essence (you can also substitute with vanilla essence)
100 ml orange juice (fresh is best, but canned will work as well)
1 tsp baking powder 
1/2 tsp baking soda 
50 ml milk
2 cups flour 
1 1/2 tbsp cocoa powder 
1 1/2 tbsp orange zest (peel the skin of oranges with a peeler and cut it very fine; you can also use candied orange peel chopped very fine or dried orange peels)

Direction 
If using fresh orange, peel and cut the zest and keep aside and juice the orange. 
In a bowl, cream the butter and sugar together. Add the eggs one at a time and whip till smooth and creamy. Add the orange/vanilla essence (I strongly recommend using orange) and the orange juice. Whip further for a minute. Now add the flour mixed with the baking powder and baking soda alternating with the milk. Stir well till no lumps remain. Now divide the batter into two equal or unequal portions and mix in the cocoa powder into one (I mixed into the one with more quantity) and orange zest into the other. In case you do not have access to orange zest (either fresh or candied or dried) you can skip it. However, you must add the orange essence then in the first step to achieve the perfect orangey flavor. 

Pre-heat the oven at 180 degree celcius for 10 minutes. Now take a 8" round pan and spray with cooking spray. Line it with parchment paper and spray again. This helps in easy release of the baked cake. Now alternately spread the two batters in whatever pattern you wish to. With the help of a long skewer or toothpick, make swirls in the batter to help form a pattern inside. 
Now bake in the pre-heated oven for 25-30 minutes or till a toothpick inserted comes out clean. Remove from the oven and let it cool in the pan for 10 minutes before transferring to a wire rack for cooling completely. Store in air tight containers once sliced. 


Tuesday, 5 May 2015

Lemon Cake with Lemon Sugar Drizzle

Lemon cakes always sounded quite exotic to me and was synonymous with a cup of freshly brewed English Tea and a beachside villa with a stunning view of the sunset. I have had earlier attempts at making this cake but never succeeded until today including the frosting, which was an absolute shot in the dark as I wanted to experiment before my next order. The recipe was shared by a foodie friend after trying it out from Averiecooks.com and I just picked it up from there and added the frosting to make it more appealing and delicious. Lemon cakes, as easy as they sound, are sometimes quite tricky if you do not have the perfect recipe and rest assured, you can totally rely on this one for the most superbly moist and light lemon pound cake to enjoy your cuppa. So all the lemon lovers out there, do not miss out on this recipe 😋😋
Ingredients 
150 gms hung curd/greek yogurt
1/2 cup white fine sugar
1/4 cup light brown sugar (you can use all white sugar. I ran out of white but I think next time I will use all brown)
2 large eggs room temperature 
1/2 cup refined oil (I used rice bran oil. You can use any neutral tasting oil you like)
1 1/2 tbsp lemon extract (it is important not to use lemon juice or lemon oil here as the taste and texture might change)
2 tbsp lemon zest (it is a daunting task and the easiest shortcut is to thinly peel the outer lemon cover and grind it to as fine a powder as possible)
1 1/2 cup maida/all purpose flour (I used cake flour)
1/2 tsp salt
tsp baking powder (I used 1 tsp double acting baking powder)

For the frosting 
90 gms icing sugar
1 tbsp lemon juice 
Few drops of water, if required 

Direction 
Pre-heat the oven at 175 degree celcius and grease a 8" baking pan and line it with parchment paper. 
Sift the flour, salt, and baking powder and keep aside. 
Beat the sugar, eggs, and greek/hung yogurt till smooth and creamy. Add the oil while still whipping. The mixture should now be getting thicker and creamier. Follow this up with the lemon extract and lemon zest. Finally, add the flour in three batches, mixing well after each addition. Do not overmix though. Pour the batter into the prepared pan and bake in the pre-heated oven for 30-35 minutes or until done when a toothpick inserted comes out clean. 
Remove from the oven and let it cool in the pan for ten minutes and then cool on a wire rack completely. 
Once the cake has cooled down, take the icing sugar and the lemon juice and mix well. The mixture will resemble a thick creamy paste. You can add a few drops of water to it to slightly dilute it (remember, just a few drops!). Drizzle this on top of the cooled cake and let it set. It's okay if some of it drips down the sides. That's the lemon drizzle look!! Serve and enjoy it with your cuppa! 


Sunday, 12 April 2015

Eggless Chocolate Cake

Eggless baking never inspired me and I am not too fond of the taste either. However with client orders for eggless cakes, I do need to bake quite often especially when most of my clients are pure vegetarians. While my regular eggless cake with yogurt is quite good, but there is a little trick to make it light and fluffy which comes with the right and timely whipping of the batter. So the result is not always the best. I was told about the milkmaid version of eggless cakes by many but I did not really try it until this weekend. I have a Black Forest cake order for next week and I wanted it to be just perfect as it was for a couple's 6th Marriage Anniversary. I tried the milkmaid version from the Nestle official YouTube channel and the result was just fabulous!! Light and spongy and moist and exactly the taste of cakes baked with eggs. Best part is that it is a one bowl recipe and does not need too much whipping or effort. Just add, mix, and bake!!
Ingredients 
1 tin or 400 gms nestle milkmaid condensed milk  (my tin was 392 gms and I used the low fat one)
100 gms butter or approximately 1/2 cup at room temperature  
1 tsp Vanila extract 
175 gms flour sifted 
25 gms Cocoa powder 
1 tsp baking powder 
1 tsp baking soda 
1/4 tsp salt if using unsalted butter 
200 ml soda water (any liquid drinking soda will do)

Direction 
Pre heat the oven at 180 degree celcius and grease and line an 8" round baking tin with parchment paper and keep aside. 
Sift the flour, baking powder, baking soda, salt (if using), and cocoa powder and keep aside. 
In a bowl mix the condensed milk and butter till smooth and creamy without any buttery lumps. Now add the vanilla and mix. Add the flour, alternating with the drinking soda, in three batches beginning and ending with the flour. Mix everything well until just combined. Do not overmix. 
Pour the batter into the prepared pan and bake in the pre-heated oven for 30-35 minutes until a toothpick inserted comes out clean. Remove the cake from the oven and let it cool in the pan for 10 minutes and then transfer to a wire rack for cooling completely. 

Monday, 1 December 2014

Eggless Wholewheat Spiced Muffins with Flaxseed

Eggless baking is quite a challenge for a baker who does not have any restriction of baking with eggs. However, the question is often raised regarding the appropriate egg substitute. While I have done some eggless baking with yogurt and the results were also fantastic, flaxseed powder is an alternative that bakers usually suggest and which I had never tried. So today as I was standing in my kitchen wondering what to bake for my week's breakfast, I decided to experiment with this egg substitute. I have used all least expensive and simple ingredients in this recipe as I was not too sure of the results and was all set to trash it if required. You can use this as a base recipe and modify the recipe with ingredients of your choice. The texture and taste was at par with any other bake made with eggs and after tasting cakes made with yogurt, I would definitely recommend using flaxseed powder as a substitute instead of yogurt. 

Ingredients
1 cup plus 1 tbsp wholewheat flour
1/3 cup honey (I added 1/4 cup honey and realized it wasn't too sweet)
1/4 cup extra light olive oil
2 tbsp flaxseed powder (I am substituting 2 eggs with 2 tbsp flaxseed powder)
1/4 cup milk
1 tsp vanila extract
2 tbsp candied citrus peel chopped (optional)
1 tsp baking powder
1/2 tsp baking soda
2 tsp mixed spice
1 tsp or more ground cinnamon for sprinkling

Direction
Take 6 tbsp room temperature water and dissolve the 2 tbsp flaxseed powder. Let it stand for 3-5 minutes. 
In a bowl, beat the honey and oil till smooth and creamy. Add the vanila and stir. Now mix the flaxseed mixture, which would become gooey by now, and stir well till incorporated. Now fold in the 1 cup flour mixed with the baking powder and baking soda and stir till no lumps remain. Add the milk and add the remaining 1 tbsp flour. Mix well. You may add another 1/2-1 tbsp flour if you find the batter too runny which should otherwise be lumpy and drop consistency. Add the chopped citrus peel and mixed spice and stir well till combined. 
Pre-heat the oven at 180 degree celsius. Line a muffin tray with liners and drop spoonfuls of the batter till 3/4 full. The batter rises beautifully and so leave enough space for the muffins to rise. 
Sprinkle ground cinnamon on top of each muffin and bake in the pre-heated oven for 15-20 minutes till a toothpick inserted comes out clean and the top is slightly golden. Remove from oven and let it cool in the pan for 10 minutes. Transfer to a wire rack and cool completely before storing in air tight container. Serve warm with a dollop of butter and some fruit preserve. Enjoy!!


Monday, 10 November 2014

Cranberry-Orange Wholewheat Oatmeal and Wheat Germ Muffins

Just as weekend means indulgence, the week means restriction at my household. Restriction not in terms of food or taste but in terms of bad calories and unhealthy food. While you can manage to restrict your diet during the three main meals, the mid-mornings and tea-times are the hardest to resist and that is where the trick to healthy eating lies. I bake a healthy munch on every week to help me get rid of my cravings as well as keep a watch on the calorie intake and nutrition level. When on a restricted diet, you are most likely prone to miss out on essential nutrients (especially for a non-fruit eater like me), and bakes such as these help me fill up the gap. Try these muffins if you like to bite into a little something with your cuppa and enjoy it guilt-free. 


Ingredients
1/2 cup raw wheat germ
1/2 cup oatmeal, lightly roasted and ground
1 cup wholewheat flour
1 tsp baking powder
1/2 tsp baking soda
1/4 tsp salt
1/2 cup dried cranberries
3/4 tsp mixed spice (you can use a mix of ground cinnamon and nutmeg; I used storebought mixed spice)
3/4 cup packed brown sugar
2 eggs
1/2 cup orange juice (I used canned)
1/4 cup extra light olive oil (you can use canola oil as well)
1 tsp grated orange rind (I used  yellow lemon rind as I did not have fresh oranges at hand)

Direction
Mix the flour, oatmeal, wheat germ, baking powder, baking soda, salt, and mixed spice and keep aside. 
In another bowl, whip the sugar, oil, orange juice, eggs, and lemon/orange rind till smooth. Fold in the flour mixture until just combined. The batter will not be runny but slightly lumpy. 
Pre-heat the oven at 175 degree celsius. Line a 12-hole muffin tray with paper liners and drop a spoon full of the batter till about 3/4th of the cup. Even out the top and continue for the rest of the batter. Bake in the pre-heated oven for 20-25 minutes till a toothpick inserted comes out clean and the top is nicely golden. If the top browns faster than the muffin being baked, lower the temperature to 160 degrees to avoid burning. Remove from oven when done and let it cool in the pan for 5 minutes. Transfer to a wire rack to cool completely before storing it in air tight containers. Re-heat the muffins for 10 secs in the microwave before serving for best results. 

Monday, 8 September 2014

Eggless Fruit Cake

I have always been comfortable baking with eggs as it is guaranteed to have the perfect results and also since there are no religious restrictions at home for baking with eggs. However, I have been often asked for Eggless Cake recipes and I was of no help to my friends. Today, I decided to step out of my comfort zone and try my hands on a simple eggless cake to know the procedure and the results and was quite satisfied and happy with what I got. The cake is even more special to me because today, for the first time, I did a demonstration of making a cake to a friend, who stays nearby and who is having failed attempts at making a cake and who dearly wants to bake one for her baby's birthday this weekend!! So glad it turned out perfect!  :)
P.S.: The recipe has been adapted from here.
Ingredients
1 1/2 cups all purpose flour
3/4 cup castor sugar
1 cup yogurt
1 1/4 tsp baking powder
1/2 tsp baking soda
1 tsp vanila extract
1/2 cup oil (I used olive oil; Though next time I will try using 1/3 cup)
1/3 cup tutti fruity
A pinch of salt
1 tbsp milk for milk wash (I got a beautiful crust even without it)

Direction
Take the yogurt in a bowl and add the sugar and whip till smooth and creamy. Add the baking powder and baking soda and mix well. Let it stand for 3-5 minutes. It will start foaming and frothing. 
Now add the oil and vanila extract and mix gently. Sieve the flour with the salt and add it to the yogurt mixture in two batches. Take care not to overmix and deflate the yogurt. Stir just enough so as to get a smooth lump free batter without any vigorous movement. Using an electric beater is not advisable for this recipe. Now dredge the fruit bits in a little flour (which you may reserve from before) and add it to the batter. Mix gently so as to bring everything together. The batter should be of drop consistency. 
Pre-heat the oven at 175 degree celsius and line/grease a loaf tin or square/circle 6" cake tin. Spread the batter into the prepared dish and smoothen out the top. Bake in the pre-heated oven for 25-30 minutes or until a toothpick inserted comes out clean. Once done and if your cake hasn't yet got a beautiful golden crust, brush the top with milk and bake again for 2-3 minutes. On the other hand, like in my case, if you have got a beautiful golden crust but your cake is still not fully cooked, take an aluminium foil and put it on top of the cake like a tent. This will prevent the crust from burning while your cake gets cooked completely. Remove from oven and let it cool in the pan for 5 minutes. 

Transfer to a wire rack and cool completely before slicing. The cake is very soft and moist and so take care while slicing! 


Saturday, 16 August 2014

My First Swiss Roll

15th of August was husband's birthday and he wished for a cake which was low in calorie as well as in guilt. Now, birthday cakes are meant to be indulged rather than count the calories. However, being the finicky guy that he is about cream and butter, I knew I had to pay heed to his demand or be ready to gulp down the entire cake myself. A bit of research showed me that it wasn't that diffucult a job either. You can have a beautiful birthdayish cake even without adding that cup of butter. The answer to my problem was a Swiss Roll. I was so pleased to know about the ingredients, I immediately set about on the task to get my tools ready. The basic success of the Swiss Roll depends on how well you have separated the eggs. A little drop of yolk in your egg whites will spoil your chances of getting the perfectly whipped stiff white peaks and creamy egg yolk batter. So you should either have an egg separator ready or be quite an expert of doing it without the tool. 
The next important step is the baking of the sponge. You should bake it just until the toothpick inserted comes out clean. A minute more than that and you will, although still have a beautiful soft and moist sponge, get cracks while rolling it with the filling. While I failed to understand this in my first attempt and hence got a few cracks here and there, it is definitely a lesson well learnt. I also tried to decorate the swiss roll with a baked pattern but I guess I have to read up a little more to get hold of the technique. My pattern got a bit burnt and so I had to invert the swiss roll and add the filling on the side of the pattern, hence those red starwberry spots in between the chocolate filling. So keeping the decorated Swiss Roll for another day!
Ingredients
4 large eggs separated (it is best to separate eggs when they are fresh and cold out of the refrigerator; once separated, bring them to room temperature before starting the procedure)
1/4 tsp salt
A pinch of cream of tartar (optional)
3/4 cup castor sugar
3/4 cup all purpose flour
1 tsp baking powder
1 tsp vanila extract

For the filling
4 cups icing sugar 
1/3 cup unsweetened cocoa powder
3 tbsp butter (preferably unsalted) cut into squares
120 ml milk at room temperature

P.S.: This is a standard chocolate sauce recipe. The excess sauce you can store in the fridge for later use. You can also use any filling as you wish like fresh fruit jam, whipped cream, etc. 

Direction
Take a 32x23 cm flat baking dish and grease it. Line the dish with parchment paper in a way that there are no bubbles or raised edges. It should be as smooth as possible. This will help you get a smooth wrinkle-free base once baked. The greasing of the bottom of the pan before lining helps keep the parchment paper in place. 
Now, take the bowl of egg whites (which you had separated while the egg was still cold from the fridge and brought to room temperature) and ensure that there are no drops of yolk or dirt in it. Add the salt and cream of tartar (if using) and beat them to stiff peaks but not dry. Takes about 10 minutes in the electric beater with the paddle attachment. 
Now beat the egg yolks till creamy. Add the sugar little at a time and beat till a pale thick and creamy batter is formed. This will take another 5-10 minutes. I usually first beat the egg whites till stiff and then use the same attachment for the yolks. It is okay to have whites mixed in the yolk but strictly no for the reverse. Hence, if you intend to use the same attachment for both the whites and the yolks, you must always beat the whites first. 
Now sift the flour and baking powder. Add the vanilla extract to the batter and beat for a second until combined. Now, add the sifted flour to the batter in two batches and mix till smooth and no lumps remain. 
Meanwhile, start pre-heating the oven at 180 degree celsius for 10 minutes. 
Now add the egg whites and with the help of a spatula (never use an electric beater) fold into the mixture till smooth. Take care not to overmix the batter which will deflate the whites. Also, always move the spoon in one direction to fold in the whites. Pour this batter into the prepared baking dish and smooth out the top.
Bake in the pre-heated oven for 15-20 minutes or until a toothpick inserted comes out clean. Check at 15 minutes and then again in 2-3 minutes. A minute over baked and you are sure to get cracks on top while rolling as well as hard edges. 
Immediately remove from the baking dish and onto another parchment paper of the same size. Roll the swiss roll along with this parchment paper and let it cool. This will help gain its shape. When just warm, unroll it gently and spread the filling without spoiling the bend and roll up again. This time without the parchment paper. Once rolled, cover it up with the paper loosely and let it cool completely on a wire rack. Slice when cooled. You can also chill it and bring it slightly back to room temperature before serving. 


Friday, 8 August 2014

Lamingtons - An Australian Delight

Honestly, I have never tasted these before but I can guarantee mine do not taste any less than those in the bakeries! Buttery soft, melt-in-the-mouth, these are the most sinful delights I have had in recent times after those Gulab Jamuns. Soaked in a silky rich chocolate sauce and dredged in a sea of dessicated coconut, these are the one of the best frosted cakes I have had and, for a change, husband also ate them happily without making a fuss about the calories. The best thing about these are that you can store them in the refrigerator in an airtight container for as long as about 2 weeks (maybe even more) and keep nibbling on them little at a time, to soothe your sweet tooth. I have selected this post to be sent as a Guest Post for my dear friend and fellow blogger, Swayampurna Mishra Singh's awesome blog LaPetit Chef. She has a beautiful blog with some of the most delicious recipes presented in the most amazing way you can ever imagine. I wanted my post to be befitting her beautiful blog and I hope she likes it.
Ingredients
For the Lamingtons
1 1/2 cup all purpose flour (maida)
2 eggs at room temperature
1 cup fine granulated sugar (I used 3/4 cup brown sugar as I don't like it too sweet)
1/2 cup butter at room temperature
1/4 tsp salt
1 tsp vanila essence
120 ml milk at room temperature
1 1/2 tsp baking powder
For the chocolate sauce
4 cups icing sugar 
1/3 cup unsweetened cocoa powder
3 tbsp butter (preferably unsalted) cut into squares
120 ml milk at room temperature
For the coating
3/4 cup grated dry coconut or dessicated coconut unsweetened

Direction
For the Lamingtons
Pre heat the oven at 175 degree celsius and grease a 23 cm or 9" square cake pan. Line the bottom with parchment paper and keep aside. It is important to grease and then line your baking tin so that the paper stays in place when you pour the batter and hence avoid a disfigured cake. 
In a bowl, beat the softened butter till soft and creamy. Make sure you do not use melted butter. Now add the sugar and beat further till fluffy and smooth. Add the eggs one at a time and beat well till incorporated. Add the vanila extract and whip. Sift together the flour, baking powder, and salt. In three batches, add the flour to the egg and butter mixture with two batches of the milk in between. That is, first add the flour, mix, then the milk, and then again the flour, followed by milk and the last batch of flour. Make sure you fold in the flour and milk completely at each addition before putting in the next batch. 
Spread the batter into the prepared cake pan and level the top with the help of a spoon or spatula. Tap the bottom on the kitchen counter to avoid any air bubbles in the batter. Bake in the pre heated oven for 20-25 minutes till a toothpick inserted comes out clean. 
Remove the pan from the oven and let the cake cool in the pan, kept on a wire rack, for 10 minutes. Now with the help of another wire rack, turn the cake over and remove the pan as well as the parchment paper and immediately turn it over again, right side up. Take extreme care while handling the cake as it is extremely soft and prone to break. Now let the cake cool completely on the rack. 
Once cooled, cut the cake into 16 even squares. 

For the chocolate sauce
Place the powdered sugar, cocoa powder, butter, and milk in a bowl, preferably with a long handle, placed over a bigger saucepan of simmering water. Stir the mixture until it becomes smooth and of pouring consistency.
Assembling the Lamingtons
Put the dessicated coconut on a plate. Keep the chocolate sauce in a bowl near the cake squares and a third plate to keep the square once coated. Now pick a square, gently coat it in the chocolate sauce on all sides except the one without the crust and immediately roll on the dry coconut and keep it on the plate. Repeat with the rest of the squares. If the frosting becomes too thick, put it back on the simmering water till it is back to pouring consistency again. You may also add a tsp of milk if required. 
Once the lamingtons have set, put them in an air tight container in the refrigerator for as long as you want. Enjoy!


Sunday, 20 July 2014

Gluten Free Flourless Delicious Quinoa Chocolate Cupcakes

Quinoa is ruling my mind and my kitchen these days. I am loving every bit of it and thoroughly enjoying my experiments with this wonder grain. After a very Indian Breakfast staple dish, Upma, and a western Veggie Bake, it's time for something sweet. What better than a cup cake to enjoy your tea/coffee with and in fact, as a dessert too with some ice cream! As I write this post, my cupcakes are already over and I am looking forward to making them soon again. 
                                 
Ingredients (Makes 8 Cupcakes)
1 cup cooked quinoa
3 tbsp butter softened (you can reduce it to 2 1/2)
2 tbsp oil (I used olive oil)
2 eggs
1/2 cup cocoa powder
3/4 cup brown sugar (add more if you like it more sweet; I like it a bit bitter sweet)
2 tbsp milk
1 tsp vanila essence
1/4 tsp baking soda
3/4 tsp baking powder
1/4 tsp salt (skip if using salted butter)

Direction
Cook 3/4 cup quinoa in 1 1/2 cup boiling water on a medium flame till all the water is absorbed and the quinoa is transparent with a whitish tail. Cool the quinoa. Measure out 1 cup and keep aside. You can keep leftover quinoa in the refrigerator, covered, for later use. 
In a bowl, beat the eggs, milk, softened butter, and oil till smooth and creamy. Add the sugar and beat further. Now add the cooked and cooled quinoa and mix. Add the essence, cocoa powder, baking powder, baking soda, salt (if using) and beat further. 
Pre heat the oven at 180 degree celsius. Now line a muffin tray with 8 paper liners and spoon out the batter upto 3/4 level of each cup. Bake in the pre heated oven for 20-25 minutes until a toothpick inserted comes out clean and the cupcakes look set. Cool on wire rack and store in air tight container, either at room temperature or in the refrigerator.


Wednesday, 11 June 2014

Wholewheat Cake Rusk

Just back from a wonderful holiday in Hong Kong and immediately after that fell terribly sick. All the recharging and rejuvinating done during the holidays went in waste. Nevertheless, the tummy continues to feel hungry and even more when I haven't had something comforting in the past few days. So I went through the pinned recipes in my diary and found this nostalgic cake rusk recipe which refreshed my childhood memories of one of the oldest bakery in my town then, Osman Bakery. As a child, I used to hate that glass of milk which is customary for every kid to drink. These rusks, which my Dad used to bring ovenfresh from the bakery while on his way back home, were a savior then. Even today, when I want to eat something nice and feel good but without any energy for anything elaborate, these crunchy crumbly rusks are a savior and are a wonderful mate for my cup of honey lemon tea in the evening or anytime of the day. They are just the way I used to have as a kid from the bakery and I am really glad I could recreate the same taste and crunch. The best thing is they are made with wholewheat although ideally it should have been all purpose flour. Frankly though, there is no difference in taste and I had completely forgotten about the wholewheat quotient until I sat down to write the ingredients!


Ingredients
1 cup wholewheat flour (ideally, all purpose flour though no difference in taste)
3 eggs
100 gms butter (approx 1/2 cup)
1/2 cup brown sugar, fine grain or powdered (white sugar is used ideally; I wanted to make it as healthy as possible)
1 tsp vanila essence
2-3 drops yellow food color
1/4 tsp baking soda
1/3 cup tutti fruity (optional)

Direction
Melt the butter in the microwave for 10-20 seconds until just softened. Now mix the sugar and whip till creamy and fluffy. Now add the eggs and beat further. Add the vanila essence and food color and mix. Now sift the flour and baking soda together and fold in to the egg mixture little at a time. Lastly, fold in the fruit bits and mix. Pour into a greased or lined medium square baking tin and spread out the batter, which won't be too runny. Smoothen the top and bake in a pre-heated oven at 180 degree celsius for 20-25 minutes until a toothpick inserted comes out clean. The original recipe called for 50 minutes but mine was done in 20 minutes flat. Remove from the oven and let it cool completely on a wire rack.
                                          
Now, place the cooled cake on a plate and cut into squares or any desired shape. Place the cut squares on a baking tray (need not be greased or lined) and bake at 150 degree celsius for 20 minutes. The baking time here depends on how you like your rusks, hard or softly crunchy. In any case, the rusks while in the oven will still be little soft and will get crunchy only once cooled. So choose your baking time accordingly. I baked them for 25 minutes while turning the sides once in between for uniform browning on both the edges. Once cooled, store in airtight containers.


Sunday, 1 June 2014

Wholewheat Apricot Cake - No Butter No Oil

Man proposes, God disposes. That is what exactly happened with me when I set out to bake this cake. I had bought a big can of Alphonso Mango puree with a long list of pinned recipes in mind. However, with the whirlwind of guests and an overdose of regular cooking, the poor can of mango puree kept getting pushed further inside the refrigerator and finally when I had the time to put it to use, my puree was all wasted! Ouch! How much it hurt! Not just the money that was wasted, but also the effort of carrying the can along with other groceries in one hand and carrying a 2 yo on the other was utterly wasted! Anyway, I ought to be more careful next time. Now, that I had got all the other ingredients for the cake ready, I could not drop the idea and with the puree gone bad, I wasn't in the mood to look up any recipes too. So decided to give it the shape of a blind bake and follow my instincts. What a cake I baked! Buttery, but without any butter, and wholewheat, but without the dense texture. A superbly soft, light, and moist Wholewheat Apricot Cake sans the calories from the butter. The whipped cream used here has only 35% fat as opposed to the 80% fat in butter and that gave the cake a super moist and buttery taste without the calories. A very good option for weight watchers too!

Ingredients
1 1/2 cup wholewheat flour
170 ml whipping cream (regular cream will do as well)
2 eggs
3/4 cup brown sugar (regular sugar can also be used)
2 tsp baking powder
1/4 tsp salt
1 tsp vanila essence 
1/2 cup dried apricots, cut lengthwise
2-3 drops each of yellow and red food color (optionally, to give the cake the same hue and color as the apricots)

Direction
Sift the flour, baking powder, and salt and keep aside. In a bowl, whip cream till smooth and creamy. If using whipping cream, whip till soft peaks are formed. The more you whip, the lighter and creamier the cake will be. Now add the sugar and whip till mixed well. Add the egg and the vanila essence and whip till smooth. Now fold in the flour little at a time and mix. Continue till all the flour is incorporated. Add the food colors and mix well. Now add the sliced apricots to the batter, reserving a few for garnishing on the top.
Pre heat the oven at 180 degree celsius. Grease a medium bundt pan and pour the batter. Tap the bottom a few times on the kitchen counter to remove any air bubbles. Bake in the preheated oven for 20-25 minutes or until a toothpick inserted comes out clean. Remove from oven and let it cool completely on a wire rack before storing in air tight container.


Monday, 17 March 2014

Wholewheat Pineapple and Plum Dimple Cake

I love my afternoon tea like many others over here and I love it even more when I have something interesting to go with it. So every week I bake something delicious and healthy which will last me for the whole week as well as take care of my husband's hunger pangs when he returns from office. Today, it was going to be a simple pineapple cake with wholewheat flour and just as I was about to take something out of the refrigerator, I chanced upon these beautiful red plums which were fresh and tout and waiting to be grabbed. I immediately pounced upon them and after a quick pitting session, upgraded my recipe to a dimple cake. I have noticed, in few of my recent bakings, I have grown up as a baker and now I confidently experiment with my cakes and cookies and breads too and every time it turns out perfect. As the old saying goes, "Practise makes perfect!"

Ingredients
1 1/2 cup wholewheat flour (I use Ashirwad aata)
3/4 cup fine grain or powdered brown sugar (you can use regular sugar too)
3 eggs (I shall include the eggless version in the notes below as this recipe was originally eggless)
1/2 cup olive oil or any other oil
1/2 tsp vanilla essence
1 1/4 tsp baking powder
1/2 tsp baking soda
3 slices of canned pineapple chopped or you can use canned pineapple chunks chopped into small pieces (reserve 5 tsp of the sugar syrup)
4 red sweet plums pitted and quartered (my plums were quite oversized and hence I cut them into quarters. You can make them into halves if you have smaller ones. Make sure they are sweet enough, else dip them in the pineapple sugar syrup for 1-2 hours before use)
Icing sugar for dusting (I skipped it)

Direction
Sieve the flour with the baking soda and baking powder and keep aside. In a bowl, beat the sugar and the eggs until smooth and creamy. Now add the oil and beat further. Add the vanilla essence. Now fold in the flour little at a time until the mixture is smooth and without any lumps. The consistency will be a little thick. Now apply a little flour on the pineapple chunks and mix. Add this to the batter and give a gentle stir. Now add the reserved 5 tsp sugar syrup one tsp at a time to make the batter a bit liquidy. However, it will not be as liquid as a regular cake batter. It should be in between the consistency of a thick custard and regular cake batter. 
Pre-heat the oven at 200 degree celsius and grease a round or square baking dish. I used a spring form pan with the base lined with baking sheet and sides lightly greased as it will be easier to take the cake out later without inverting. You can use a regular dish but have to be quick with the inverting and re-inverting the cake. Pour the batter into the prepared dish and carefully arrange the pitted plums on the batter. Gently press into the batter and bake in the preheated oven for 10 minutes at 200 degree celsius and then for another 20 minutes at 175 degree celsius or until a toothpick inserted comes out clean. Remove from oven and let it cool in the pan for 10 minutes before transferring to a wire rack for cooling completely. The cake tastes best when allowed to cool completely. So hold on till it cools down!


Notes for Eggless Version:
To substitute eggs in this recipe, take 1 cup yogurt. Beat the yogurt and sugar together until creamy and then add the baking powder and baking soda. Let it stand for 3-5 minutes. The mixture will become frothy and then continue with the rest of the procedure. You do not need to sieve the flour with the baking powder or soda in this version.


Friday, 31 January 2014

The American Sponge Cake

Some recipes tend to surprise you and this is one of it. I had never made a Sponge cake but always loved to have one. Recently, I had this strong urge to take up the task and so quickly looked up a recipe from Joy of Baking. However, I had just finished a big batch of muffins and cookies that I had made for my daughter's birthday and there weren't many interested people (read husband) to eat more cakes at home. But opportunity did come in the shape of a sudden dinner plan at my place with some friends. I immediately got together the main ingredients (eggs!) and was happily making it. What made me more happy was the discovery that the recipe did not require any butter/oil and just a little flour than what a regular cake recipe calls for. So get ready for a slightly guilt-free indulgence!

Ingredients
1 cup all purpose flour
6 large eggs separated
1 cup fine granulated sugar divided
1/4 tsp baking powder
3/4 tsp cream of tartar
1 tsp vanilla essence
Zest of 1 orange/lemon (outer covering)
1 tsp almond essence (optional)
2 tbsp water

Direction
In two separate bowls, take out the egg yolks and the egg whites. Beat the egg yolks and 2/3 cup sugar until light in color and creamy. Now add the essences, zest, and water and beat to a smooth creamy texture. When you hold the batter up with a spoon, it should fall back like a smooth ribbon. 
Now, beat the egg whites until foamy. Add the cream of tartar and beat further. This ensures the moistness of the cake. Now add the remaining 1/3 cup sugar and beat until soft white peaks are formed. 
Sift the flour with the baking powder and add it to the yolk mixture, 1/3 cup at a time. Gently fold with the help of a spatula. Now add a little of the egg white and fold in without mixing too much. Add the remaining egg whites and fold in gently just until incorporated. Over mixing will deflate the batter. 
Pre-heat the oven at 175 degree celsius and grease a spring form pan or any regular cake tin. Pour the batter into the prepared tin and smoothen the top. Bake for 35-40 minutes or until a toothpick inserted comes out clean. Monitor the temperature in between to ensure no over browning on the top. Cool on a wire rack. You can garnish the cake by sprinkling some icing sugar through a sieve or with the favorite icing and fruit topping of your choice.


Note:
1. Tastes best if refrigerated overnight.
2. The secret to a soft and fluffy sponge cake lies in how best you beat the egg whites.
3. Initially it may taste a little dry and have a strong eggy smell. Refrigerate overnight and the smell would be no more.
4. You can add an extra teaspoon of vanilla essence.